Lesson #11 Weapon Effects
Sound
Every weapon has a sound. Let's make our weapon more audible. We'll add sound effects for shooting, reloading, and dry firing.
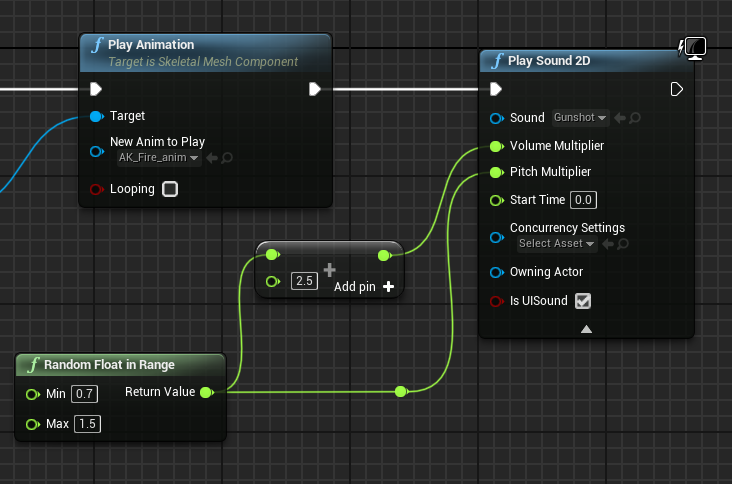
1. Let's add some sound to the shooting. Open the AmmoCheck function in your AK blueprint. Create a Play sound 2D node after the play animation. In addition, add a random float in the range, set it to 0.7 - 1.5, and connect it to pitch. Let's multiply our random range by 2.5 and connect it to volume. This will add variety to the sound of our shots. Choose Gunshot as a sound effect as well.
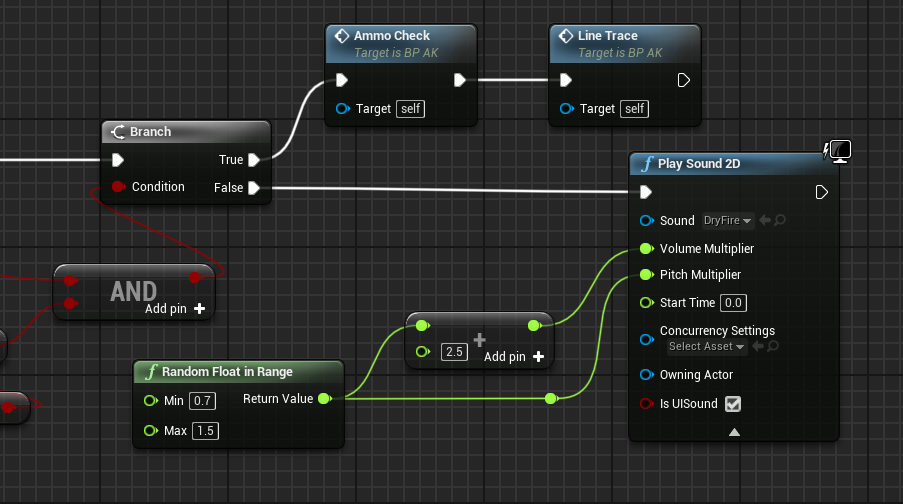
2. Let's add some dry shooting sound effects. This is the sound effect we hear when our gun is empty. Open the event graph and play dry sound after the branch where we are checking for ammo. Copy and paste the last nodes into our event graph. If we don't have any ammo, we'll use the drysfire effect.
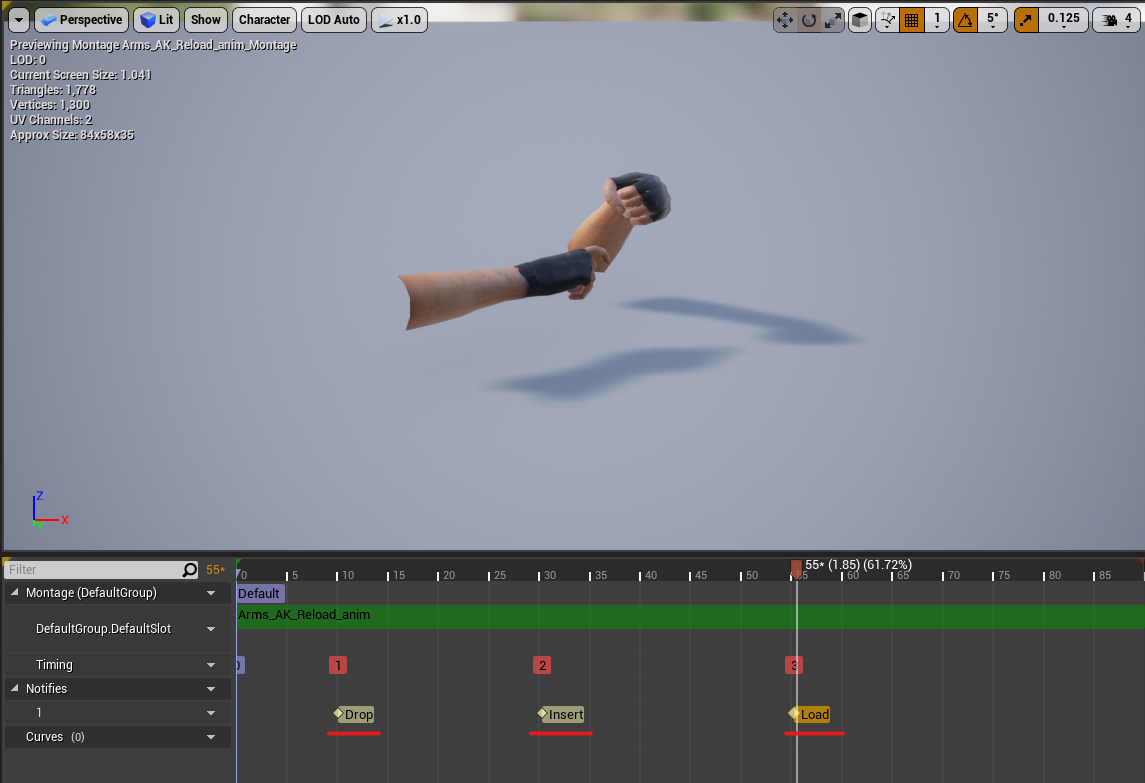
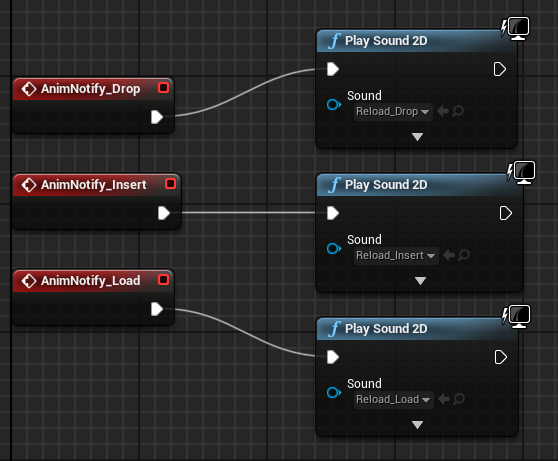
3. Let's make a reloading sound. For thet, we have three different sounds (Magazine droping, inserting and loading weapon). First and foremost, let us add notifications to our arms. Open the arms reload animation montage and add three notifications to the Notifies track. Right-clicking and creating notifications for drop, insert, and load (I added to frames 5, 30 and 55).
4. Now open up arms animation blueprint and in Event Graph add Notify Event nodes.
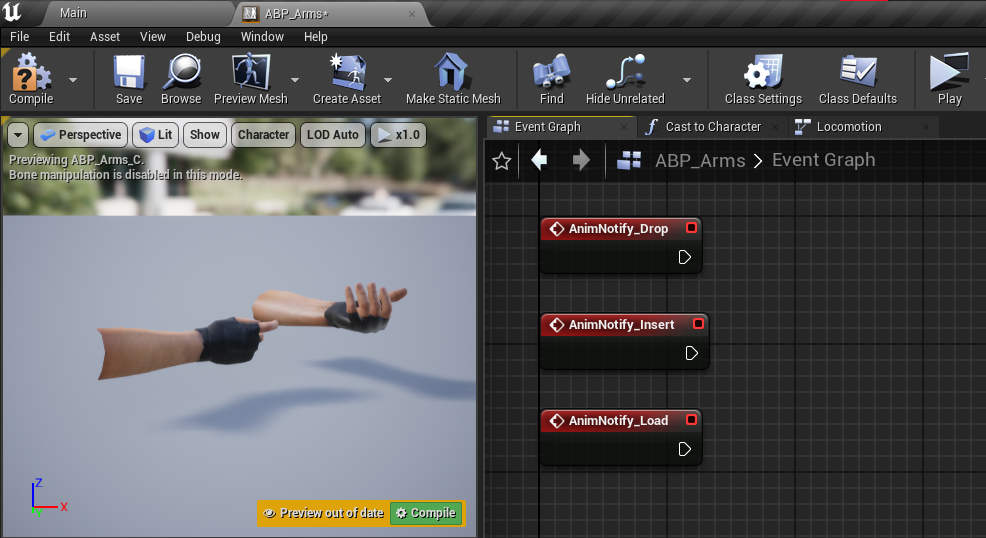
5. Create a 2D node for play sound and play different sounds for each notification. Compile, save, and we now have reloading sound.
Now we have created all the sounds for our AK weapon.
Tracer
Tracer is the line that follows the bullet. We're going to make a tracer to simulate a flying bullet.
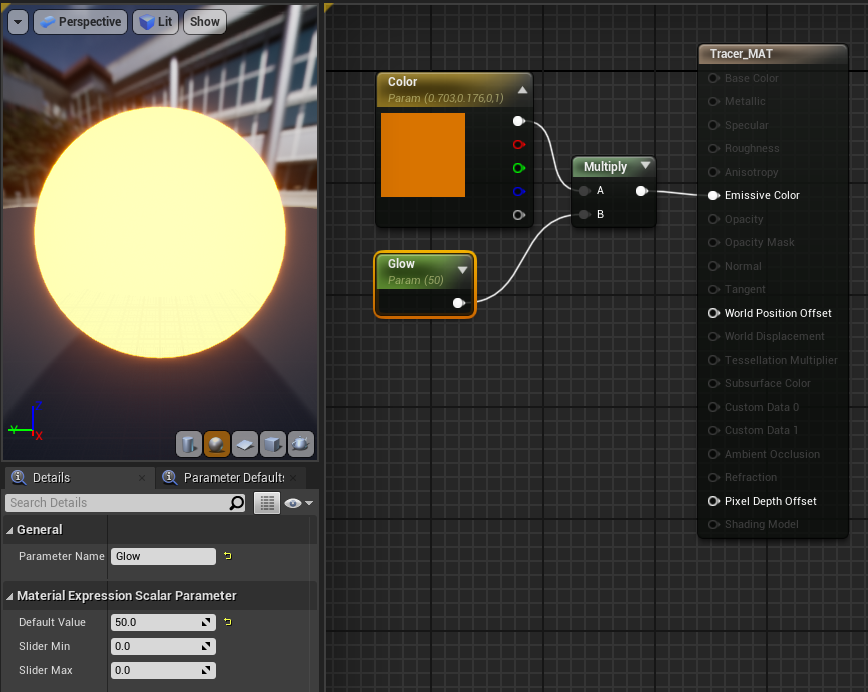
1. Let's start by making the tracer material. Open it in the materials editor and name it Tracer_MAT.
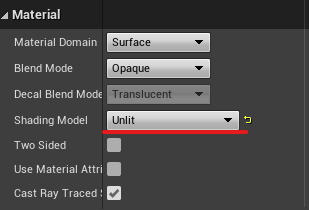
2. Change the Shading model to unlit.
3. By holding down the 3 button, you can create the Color parameter (convert to parameter and set color). Hold M to make a multiply node, and S to make a parameter node (call it Glow and set to 50). Color and glow should be connected to multiply, and multiply should be connected to emissive color. Apply and save your changes.
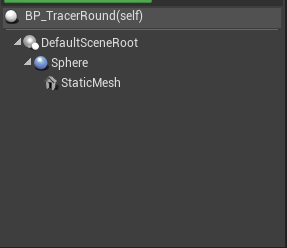
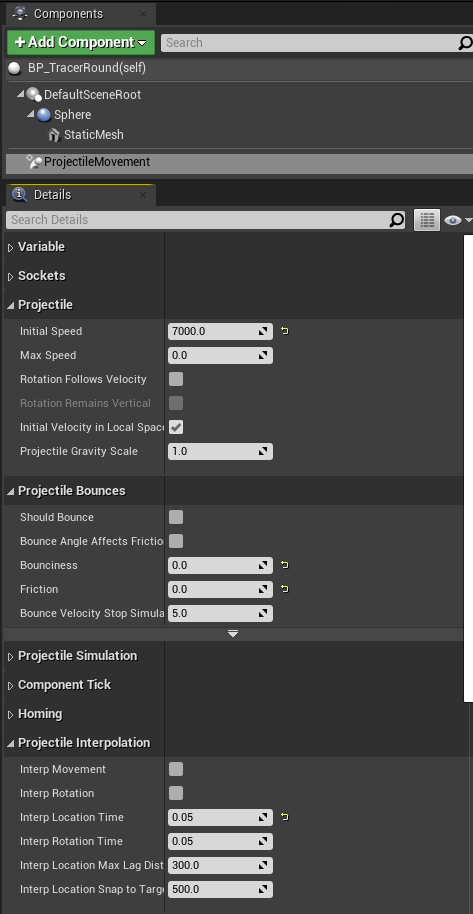
4. Create actor blueprint and call it BP_TracerRound. Open it up and add SphereCollision and StaticMesh components.
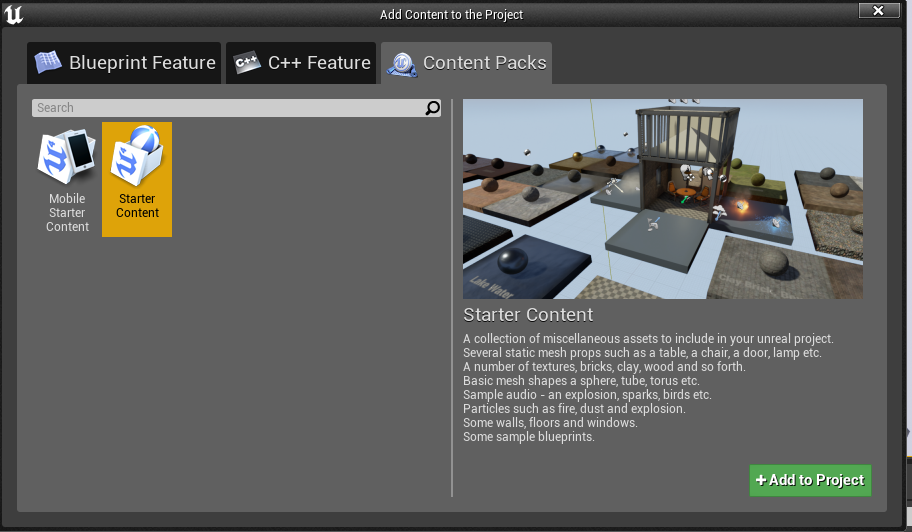
5. Now we need to add a sphere to our static mesh, but there is no sphere model in our content browser. We already have sphere in the starter content, so let's add it. Click add/import in the content browser to add a content pack. Choose starter content and import from there.
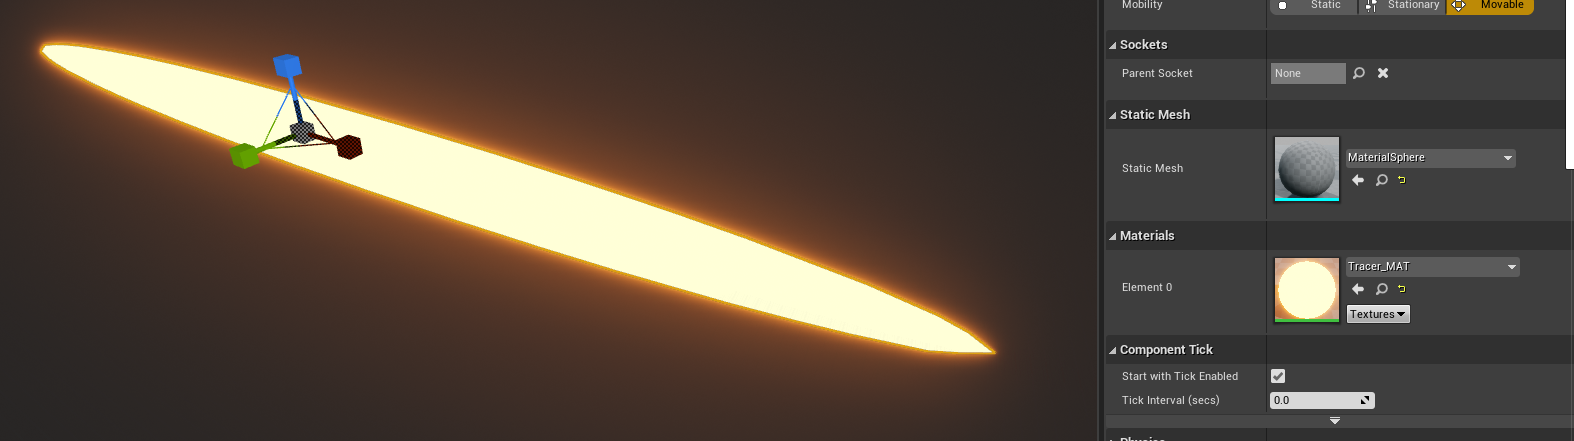
6. Now, in the static mesh, select MaterialSphere as the mesh and our tracer material as the material. Also, stretch the sphere to make it look like a tracer. You can do it by adjusting the scale.
7. Let us now add the projectileMovement component. This is a built-in function that causes objects to move when they are spawned. Set the initial speed to 7000, the bounciness and friction to 0, and the interp location time to 0.05.
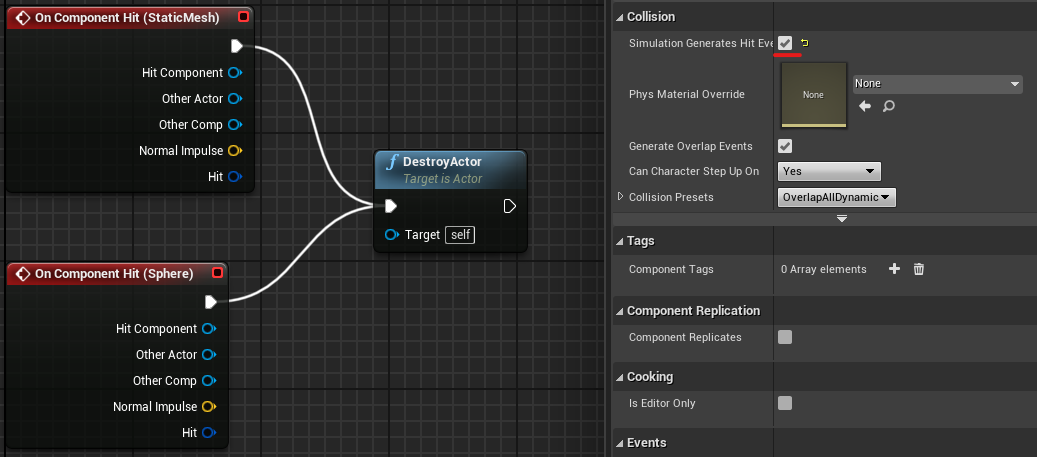
8. Let's give our tracer some logic. We need it to be destroyed every time it collides with something. Launch Event Graph and select our static mesh component. There are a lot of green + buttons in the Events section. We must include an On component hit event. Do the same for Sphere.
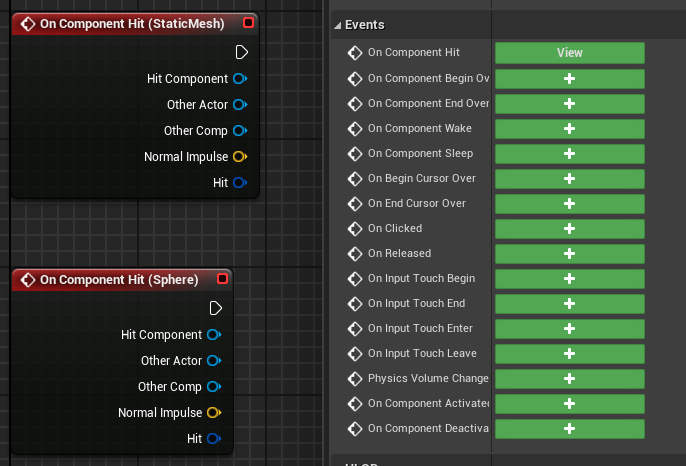
9. Now, add the DestroyActor node and connect the two components to it. Also, under Collision, check the box to generate Hit Events for Sphere and StaticMesh. Compile and save your work.
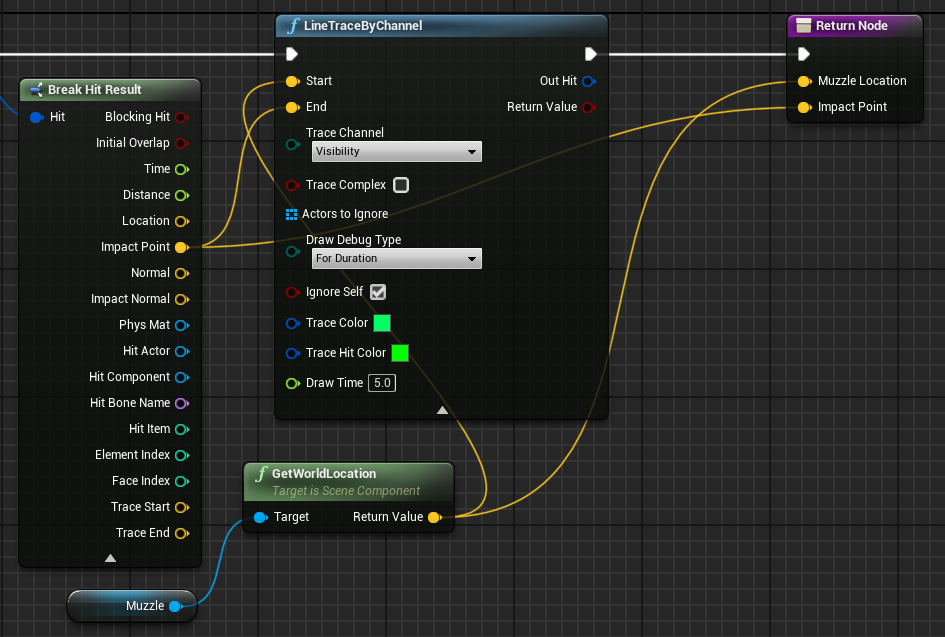
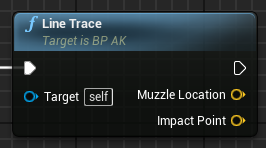
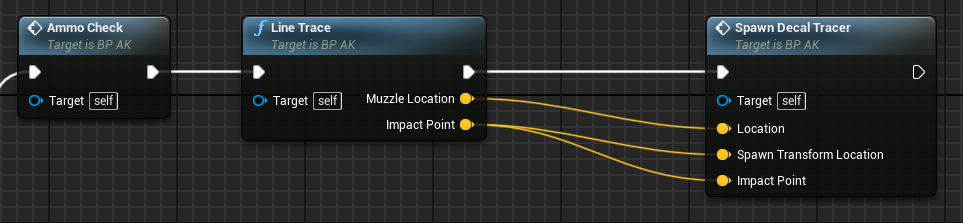
10. Add a return node to the op AK blueprint Line trace function. Connect the Muzzle location to the impact point. This will allow us to use them after the function is called in the event graph. You can also change their names (I changed first return value to muzzle location)
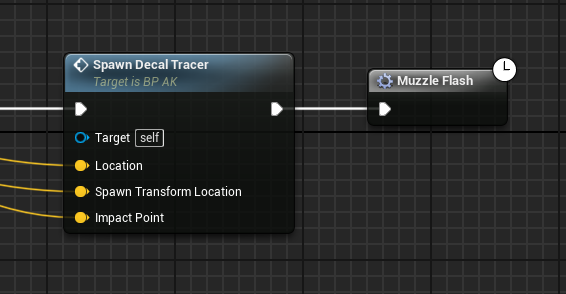
11. In our AK blueprint, add a new function called SpawnDecalTracer. Make three different inputs for it (Location, SpawnTransformLocation, and ImpactPoint as vector values).
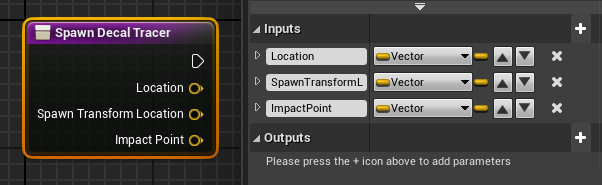
12. Drag and drop this function after the Line trace in the Event Graph and connect the Muzzle location to the location and the impact point to two other inputs.
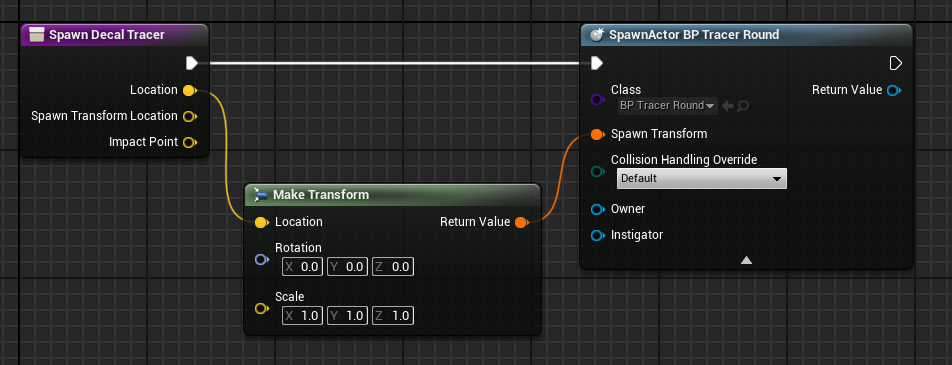
13. Let's send out our tracer. Make a Spawn Actor node and select our tracer blueprint. Create a Make transform node from the location output and plug it into the transform input of our spawn actor node.
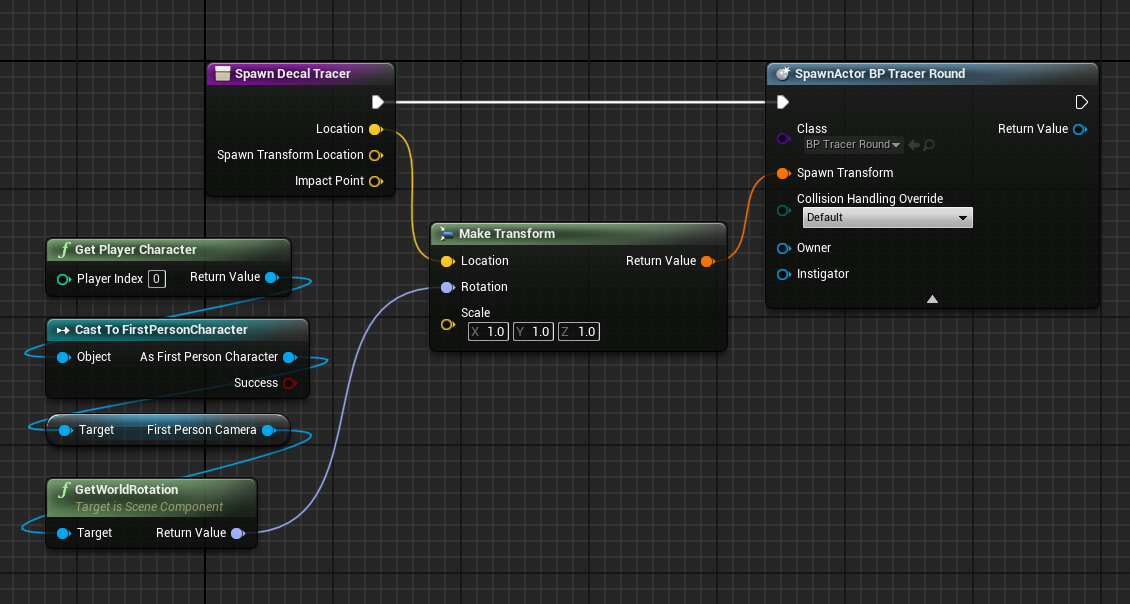
14. Let's get our player rotation in order for the tracer to rotate correctly. Cast to FirstPersonCharacter (pure cast) > Get the player character Take the camera and its rotation and place it in the rotation input of the transform node. Reduce the size of our tracer until you're satisfied.
Muzzle Flash
Let's make a muzzle flash. This is the flash that is emitted whenever a weapon shoots from its muzzle location.
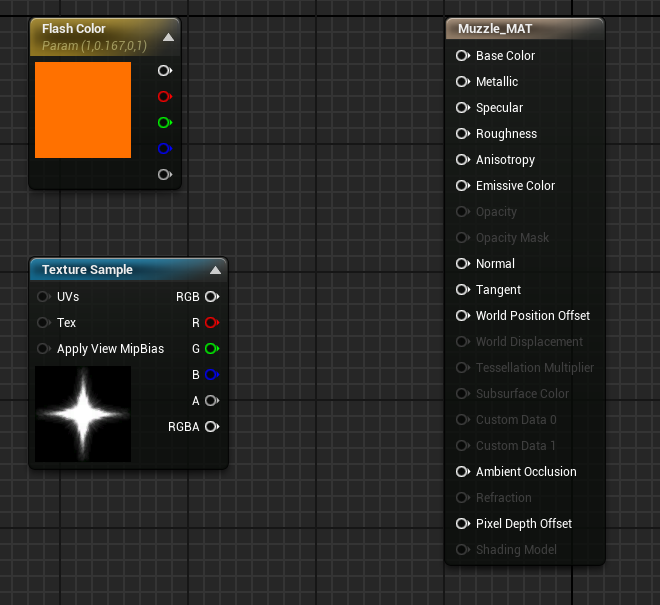
1. Let's make some materials for that flash. Create a new material called Muzzle_ MAT in your materials folder. Then you can open it.
2. Add a Color node by holding 3 and left clicking, then right clicking and converting it to a parameter, then renaming it Flash Color. Also, by holding T and left clicking, you can add a texture node. Select the Muzzle Flash texture in the Texture node. Change the muzzle color to something you like (usually yellow/orange).
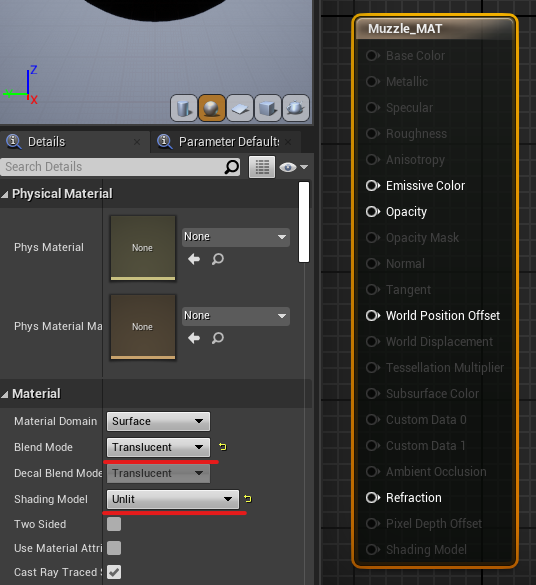
3. Change the MAT node blend mode to translucent and shading model to Unlit. Also check two sided.
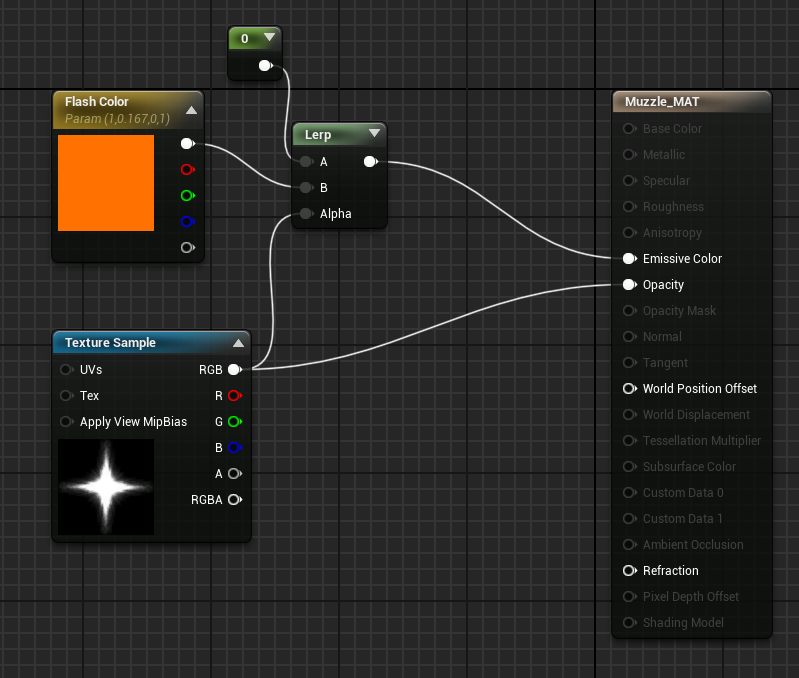
4. Connect the RGB output of the texture to Opacity. Then, while holding L, create a Lerp node and connect the color's main output to B and the texture's RGB output to alpha. By holding 1 and clicking left, you can create a constant and connect it to A. Connect the Lerp node to the Emissive color.
5. However, it does not appear to be very appealing. Let's add some radiance to it. Hold M to create a Multiply node, and S to create a parameter. Set the name of the parameter to Glow and the default value to 25. Connect the Lerp output and the Glow output to a multiply node, then to the emissive Color.
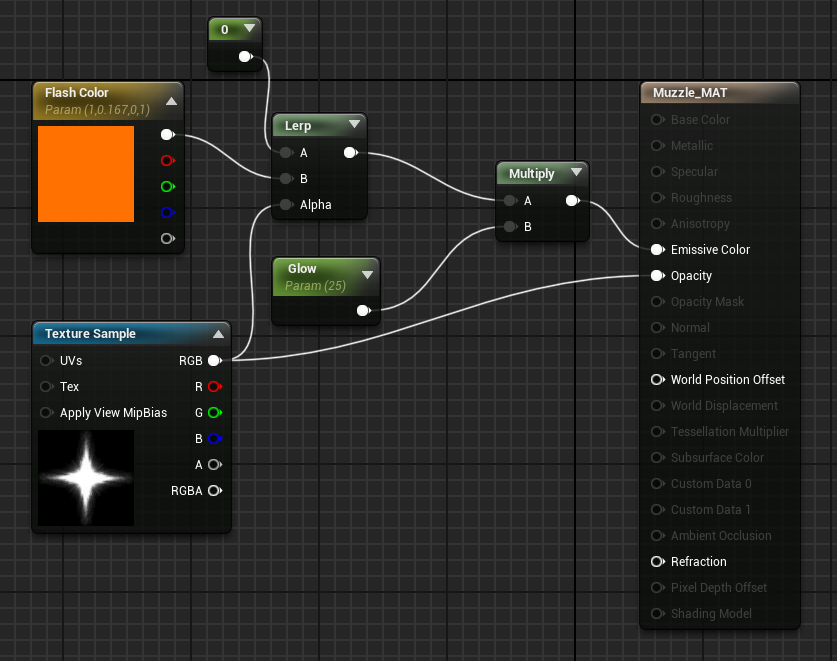
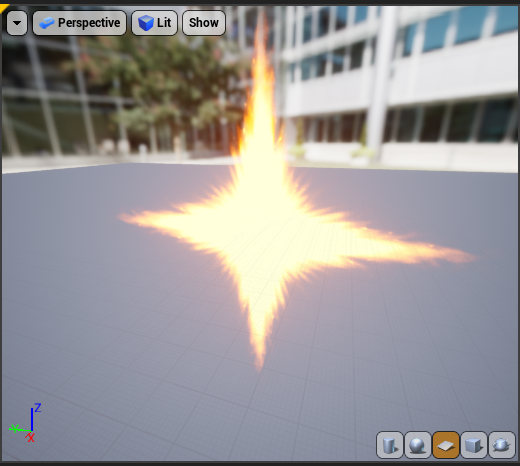
Now our muzzle flash is looking much more like flash. Don’t forget to apply and save.
6. Let's now open up our AK and add the Point light component. Let's also add a static mesh and select a plane. We'll put a plane in front of our muzzle.
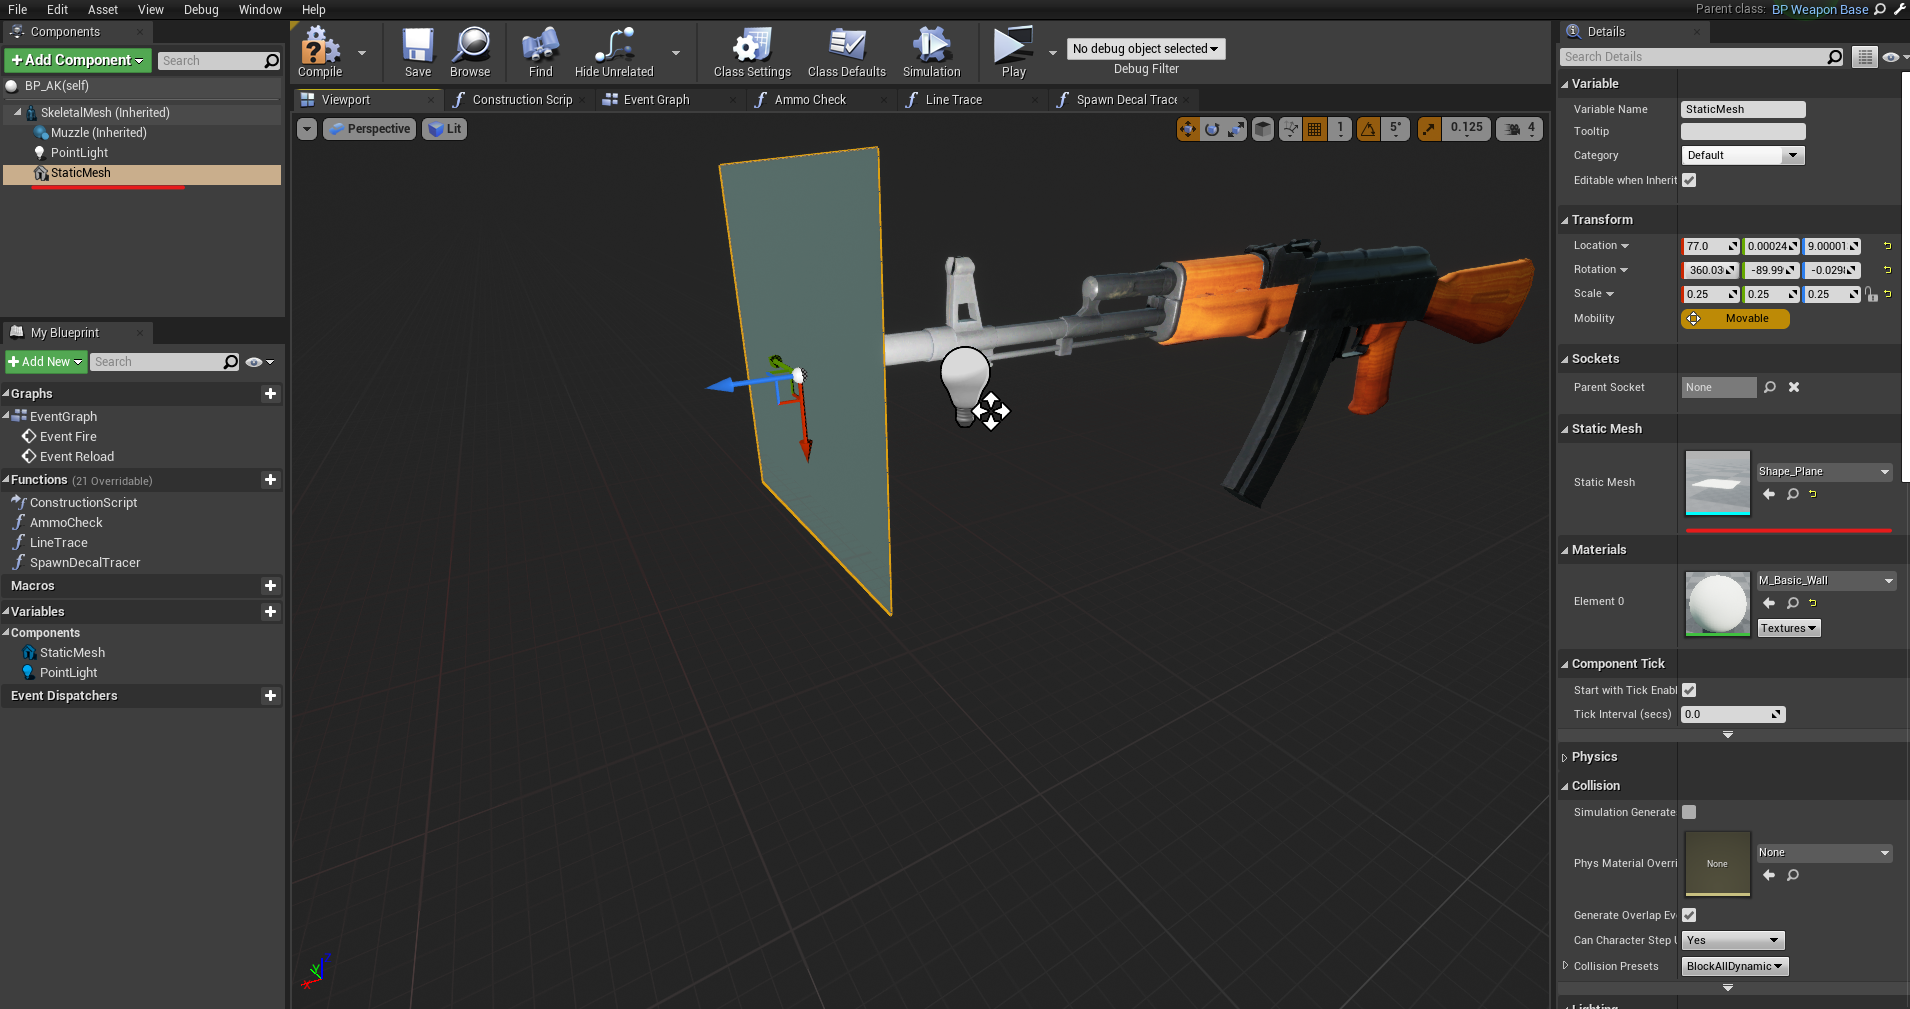
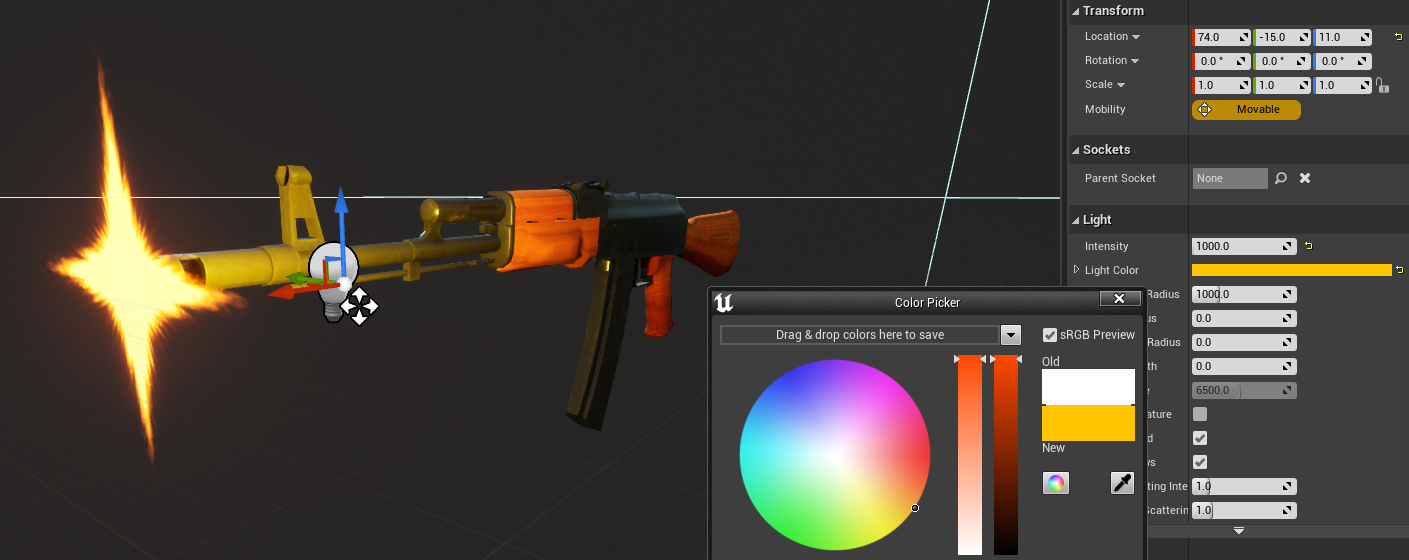
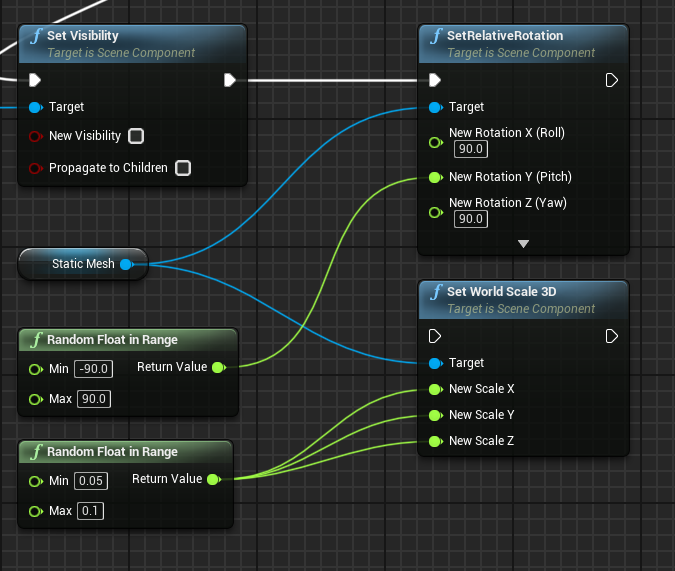
7. Change the color of the point light and the muzzle texture for the plane. Reposition it so that it looks nice. Disable visibility for the muzzle flash by clicking on it (you can search it in details panel). Set the point light intensity to 0 as well.
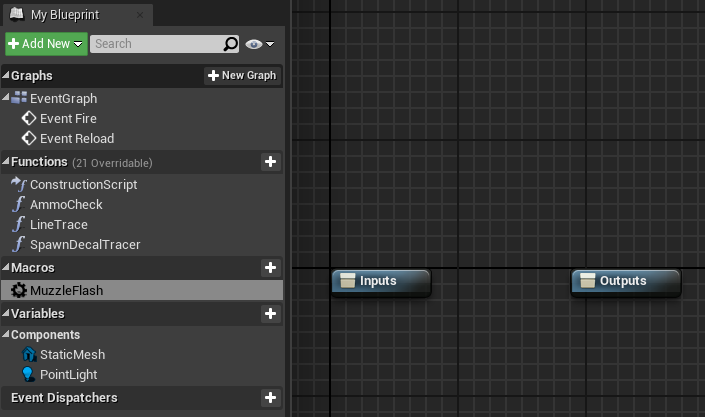
8. Now, instead of functions, let us create macros. It is preferable to use macros over functions that have a lot of time-based things and functions that need to happen quickly, such as flashing our muzzle. Create macros in the same place you create functions and name them MuzzleFlash.
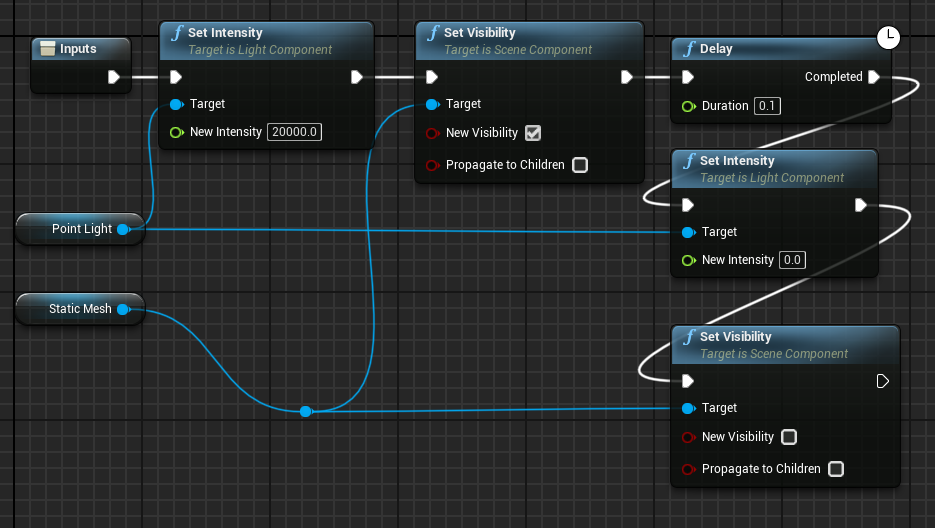
9. Drag the point light and muzzle into the editor now. Create a SetIntensity node from the point light and set it to 20000. Create a setVisibility node from muzzle and set it to visible. After that, add a 0.1-second delay and repeat the steps, but this time set the intensity to 0 and the visibility to false.
10. Let's make our muzzle rotate in an unpredictably random direction now. Drag and drop the SetRelativeRotation node and the SetWorldScale node from Static Mesh (split transforms into multiple points). Create two random floats in range now (for scale from 0.05 to 0.1 and for rotation -90 to 90). Set rotation random to Y rotation and others to 90 degrees. Set the scale to random for all scales as well (X, Y, Z).
11. Set our macro after Spawn Decal Tracer function, then compile and save.
We've finished making our muzzle flash. You can experiment with different values, such as reducing the intensity of the point light.
Bullet decal
Bullet decals are the marks that bullets leave on surfaces. Let's make it.
1. Make a material called BulletDecal_MAT for our decal. Launch the material editor.
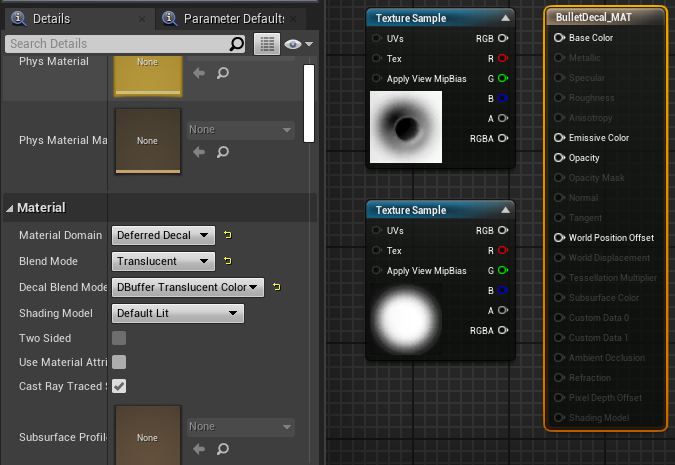
2. By holding T and left clicking, you can make two Texture nodes. Choose BulletDecal_M texture for one and BulletDecal_M texture for the other. Set the material domain to Deferred Decal, the blend mode to Translucent Color, and the decal blend mode to DBuffer Translucent Color.
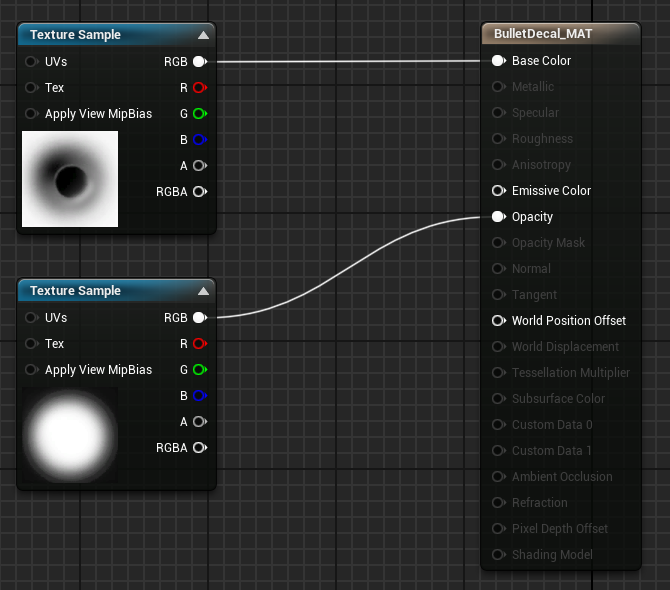
3. Plug our D texture into base color and M texture into Opacity. That’s it, Apply and save.
4. Make a new actor blueprint and name it BP_BulletDecal. Open it up and insert the Decal component. Choose our BulletDecal_MAT as the decal material and set the fade start delay to 5 seconds.
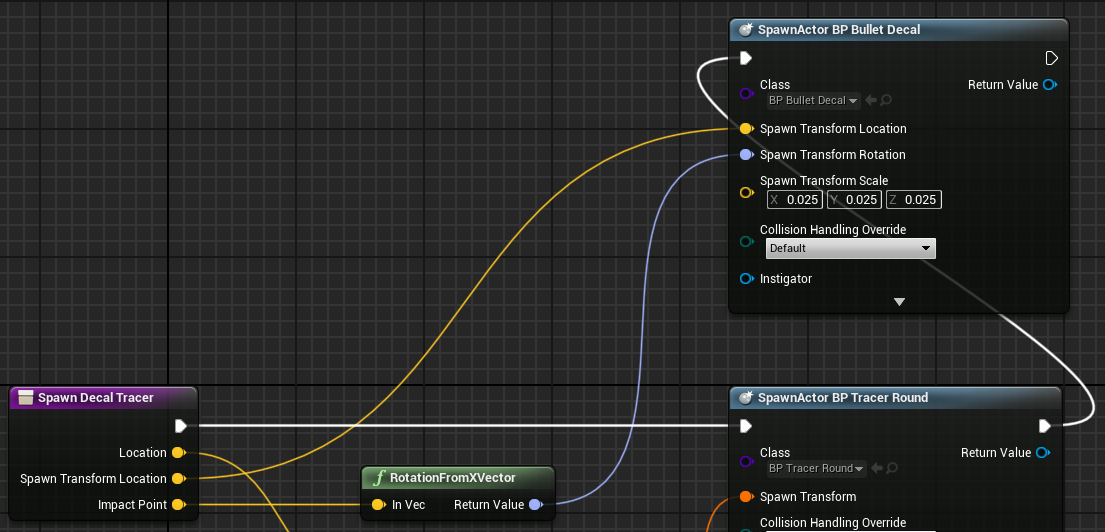
5. Open your AK blueprint and create another spawn actor in the Spawn decal function, but this time the class we will be spawning is our BP_BulletDecal. Split its transform pin and set the Spawn transform location to the transformed location we received. Create a RotationFromVector node from the impact point and pin it to the Rotation input. Set the scale to 0.025 as well, because it is too large.
We now have bullet holes in the walls.
In the following lesson, we will design HUD elements for our bullets and player health.
© 2025 Edward Leks. All rights reserved.