Lesson #6 Blueprints
What are Blueprints
Essentially, these are your game elements, such as the player, HUD, game modes, and so on, with logic attached to them. In this tutorial, we will make a basic lantern with blinking lights.
How to work with Blueprints
The Blueprint Visual Scripting system in Unreal Engine is a complete gameplay scripting system based on the concept of using a node-based interface to create gameplay elements from within Unreal Editor.
This means you can program your game without writing code, because everything is already done for you. All you have to do is connect nodes.
Types of Blueprints
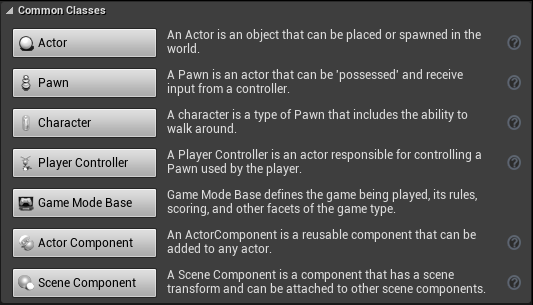
There are numerous types of pre-built blueprints. However, there are seven that are frequently used. When you create Blueprints, you can choose from common classes and get a brief description. The main blueprint is Actor, which is essentially an empty object.
Creating Blueprints
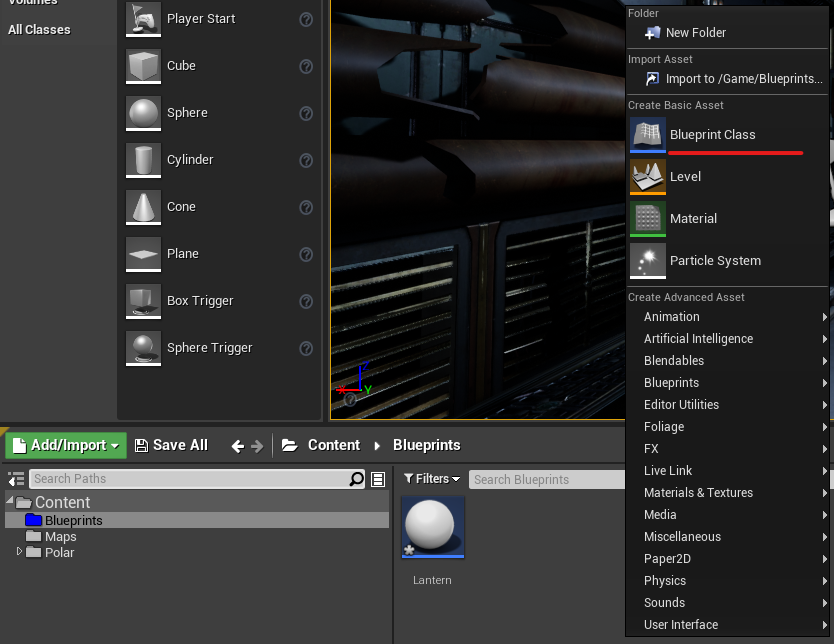
It is extremely simple to make one. But, first and foremost, it is advised to stick to the structure. Make a folder called "Blueprints" and put all of your blueprints in it. (You can also change the color of the folder; I prefer blue.)
1. Then, in the content browser, right-click to create a blueprint.
2. Make an Actor class.
3. Rename your blueprint and launch it.
Open up your blueprint. You are now in the blueprint edit window. You can create game objects and write logic for them there.
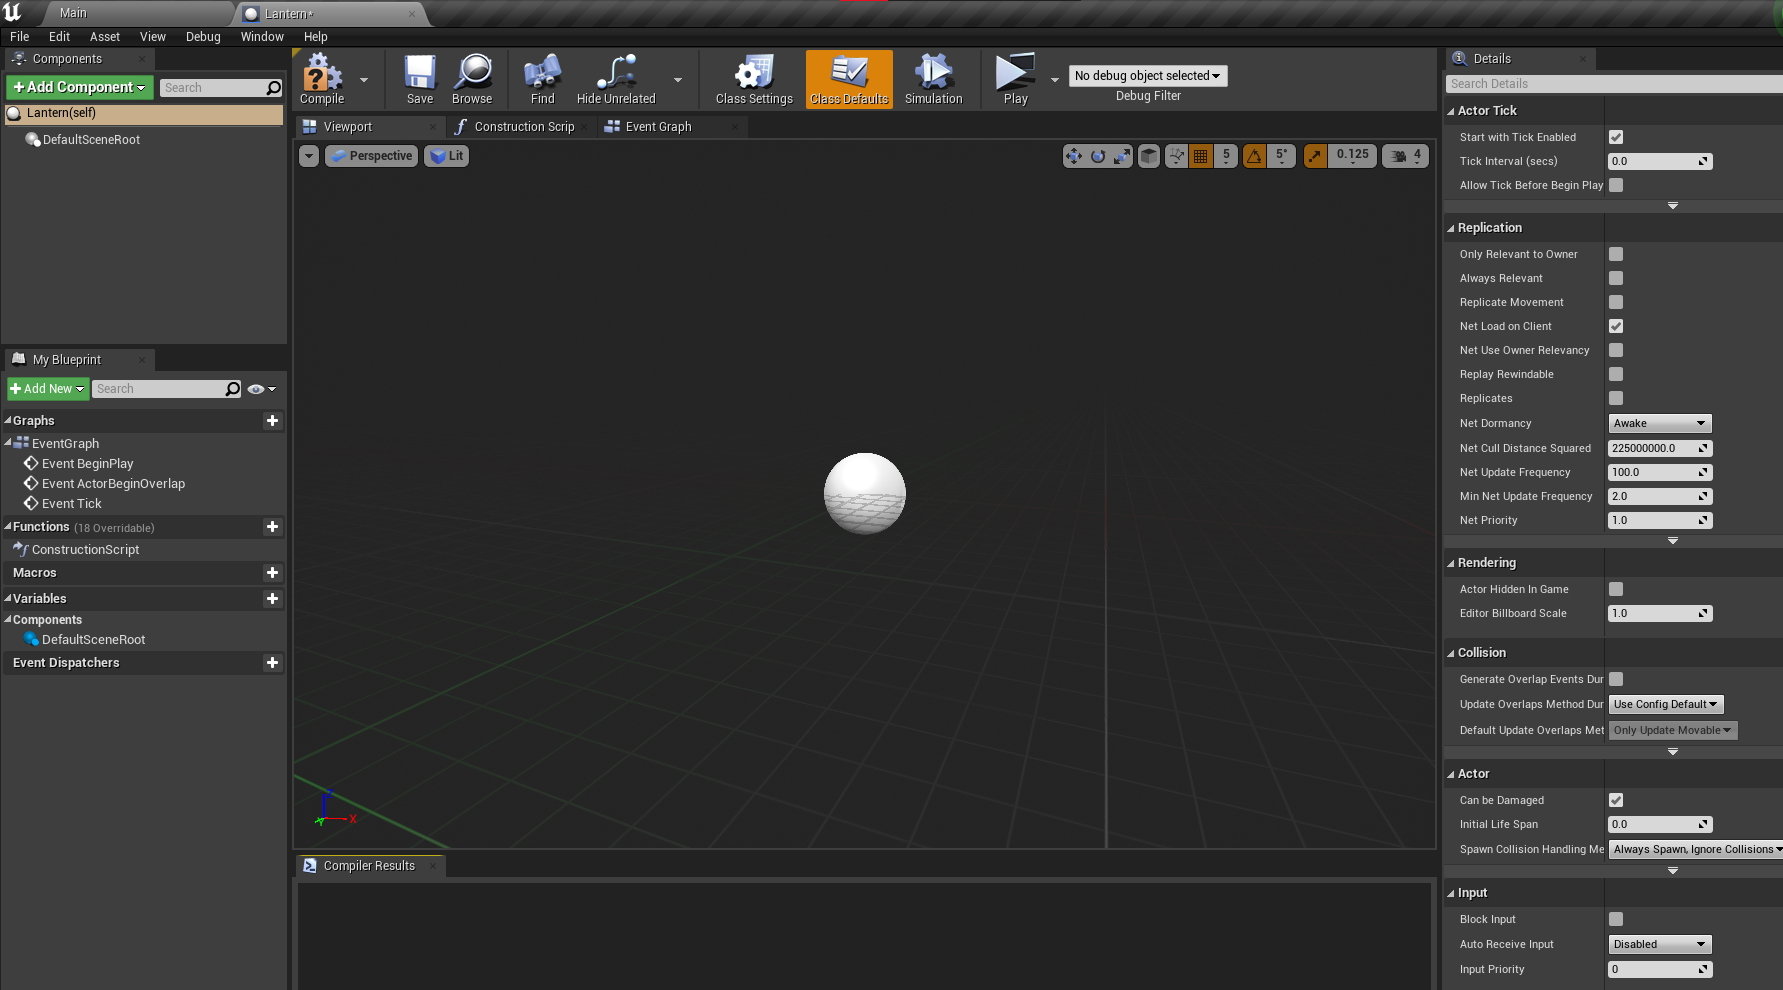
Your object's visual representation can be seen in the viewport. You can also write logic in the event graph. You can add various components to your object in the components window (pre-made or your own). You can create variables and functions for your blueprints in My Blueprint window. In the Details panel, you can also change the settings of various components. Let us now make our lantern.
Creating Lantern
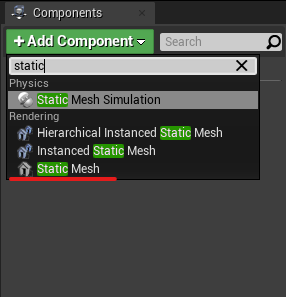
1. Add static mesh component (this components allows us to add objects)
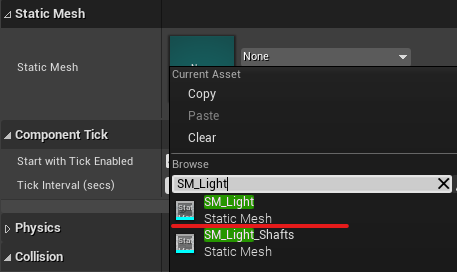
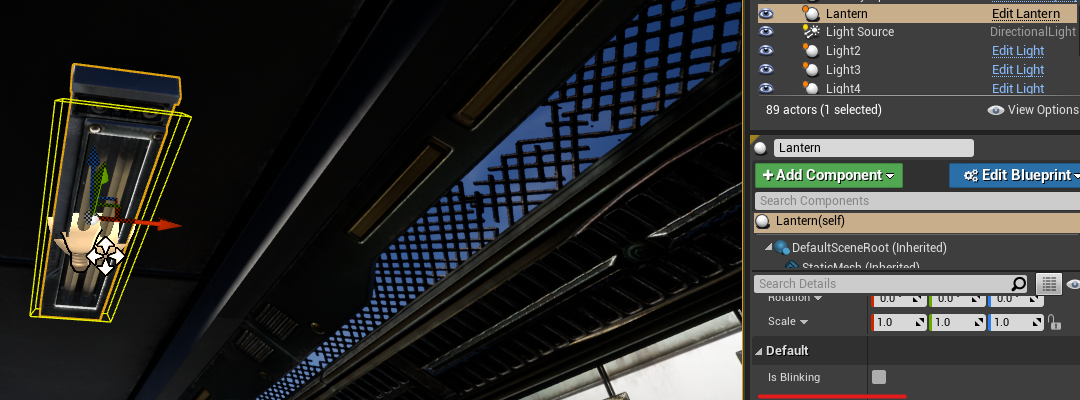
2. Select a lantern from our Polar pack in the Details panel > Static mesh. Following that, you should see a lantern in the viewport. You can change its rotation, position, and so on. (I recommend turning it upside down so that it can be placed more easily in the future.)
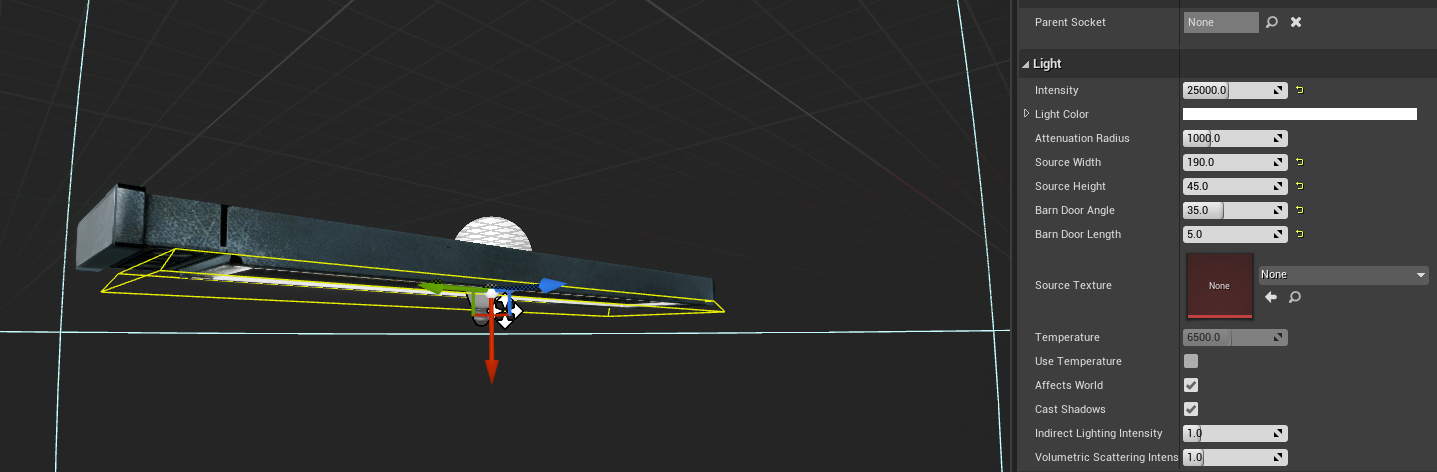
3. Let's add some light to it now. You may remember from our lightning lesson that we have Rect Light, which comes in very handy with this lantern. Add another component, but this time it should be "Rect Light." Rotate and transform it so that it appears normal. You can adjust the width and height of the light in the details panel.
4. Now you can compile and save your blueprint and already place it into your level.

But there is no logic in this lantern. So lets create blinking effect.
Creating blinking
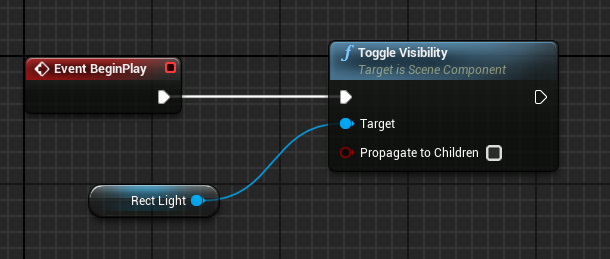
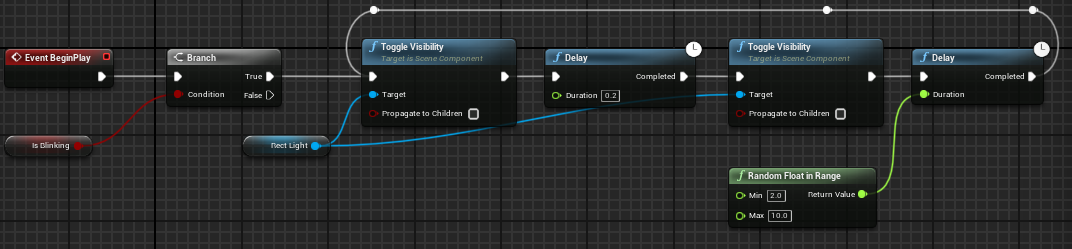
To do so, open the Event graph in your blueprint editor. This is how it should look.
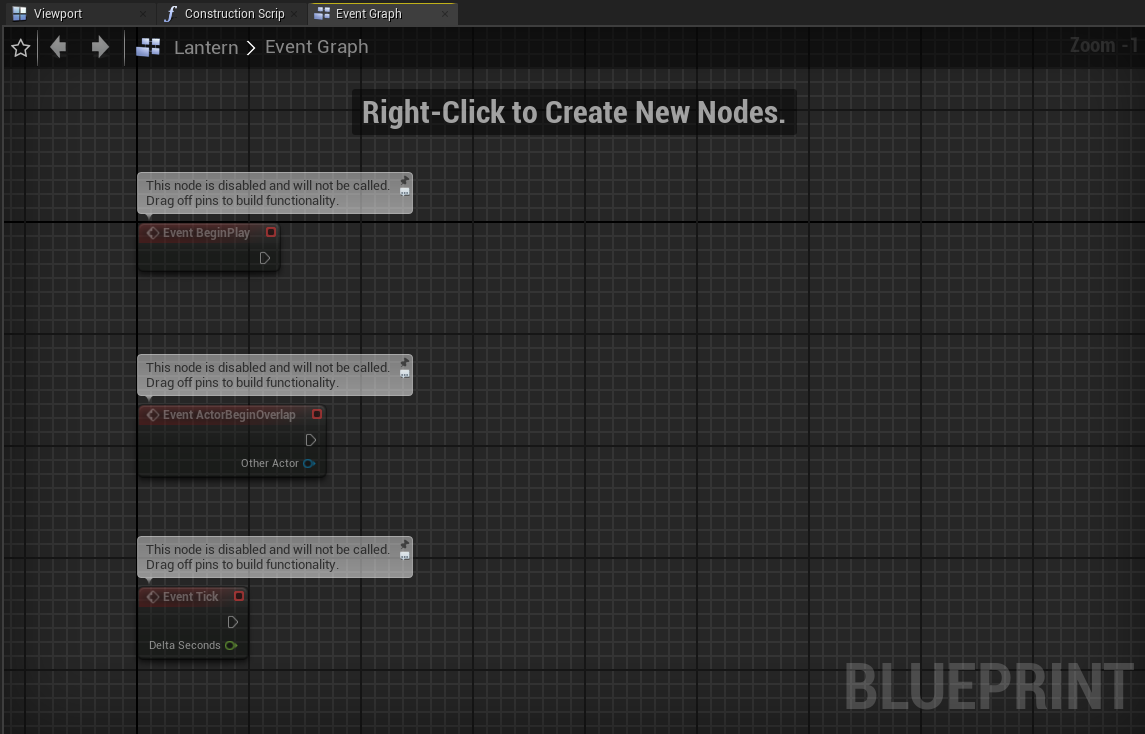
Blueprints can be used with events. For example, "Event BeginPlay" is triggered when you press the play button, which means it will be active from the beginning of your game.
You can create nodes by right-clicking or dragging into empty space.
Let's make a blinking effect. For this, we will hide/show our "Rect light" randomly.
1. We need to set our light visibility. Drag and create ToggleVisibility(RectLight) node. It will turn off your light
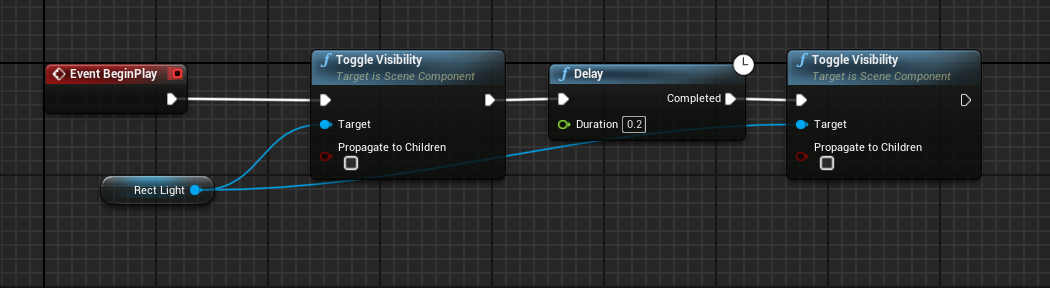
2. Now, let's add delay and re-enable it. To turn it back on, create a new Delay node and ToggleVisibility again. To copy and paste nodes, use Ctrl+c and Ctrl+v. Don't forget to select a toggle target (Rect Light).
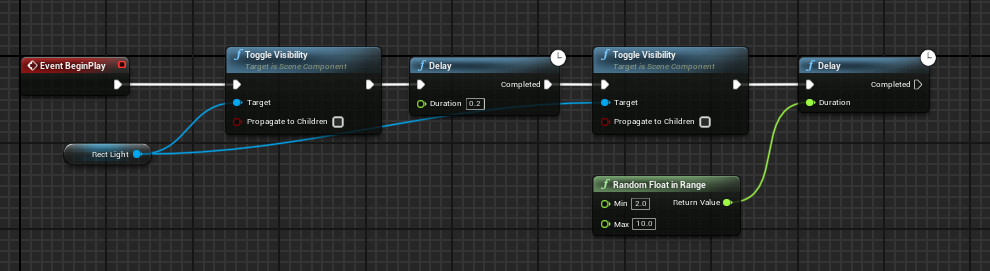
3. Now, we will hold the lantern on for a random amount of time before turning it off. Add another delay and a "Random Float in Range" node to accomplish this. There, you must specify the minimum and maximum time the lantern will be turned on.
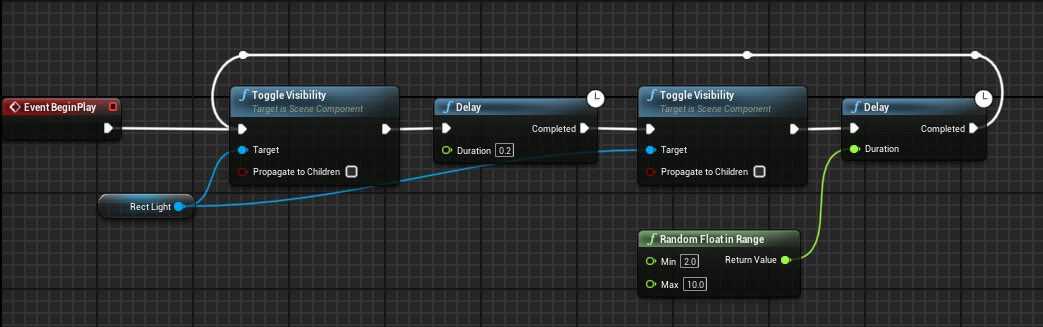
4. Let's make a loop because it will stop working after the first on/off. The white line in the editor represents the flow of your logic. When the last delay is completed, we need to go back to the beginning. A very simple way to do this is to drag a white line into the first ToglleVisibility node again. (You can double click the lines to add more points.) After compiling, your light will blink randomly.
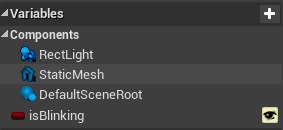
5. But what if you don't want all of your game's lights to blink? One solution would be to create another lantern without logic, but this would be too complicated in the future if you had the same objects with different logic. We have variables for this purpose. To make one, click the + button in the variables section. Let's make a true/false variable (Boolean) called isBlinking (hit the eye icon to see it in the editor as well).
6. Now, let's add a check for isBlinking and build our blinking system around it. After the BeginPlay node, add a Branch node with the isBlinking variable as a condition (Drag variable to the viewport, get the variable and connect it).
You will now see a checkbox on every lantern in the game. Setting it to true will cause your light to blink, and it will now be unique for each lantern in the game without the need for additional blueprints.
In the following lesson, we will create a player controller.
© 2025 Edward Leks. All rights reserved.