Lesson #9 FPS Character
Animating Arms
First and foremost, let us position and animate our arms. Depending on what the player is doing, we need to play different animations (Standing, running, jumping).
1. Let's get our arms in a good position. Open your FPS_Character blueprint and select your arms in the Mesh1P component under the Mesh section. Then position them in front of the camera.
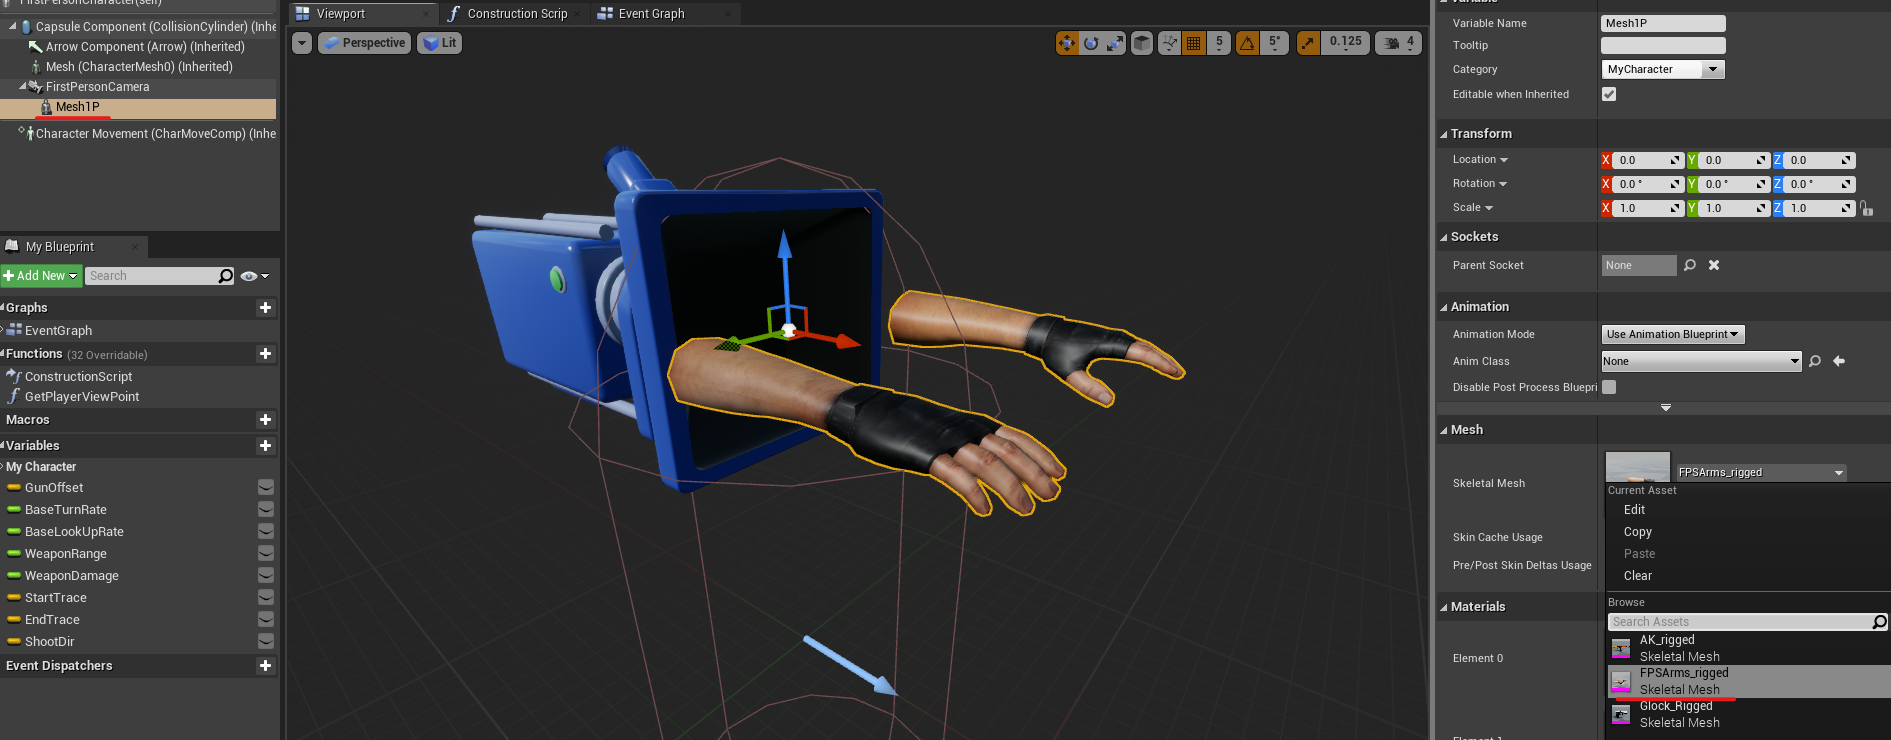
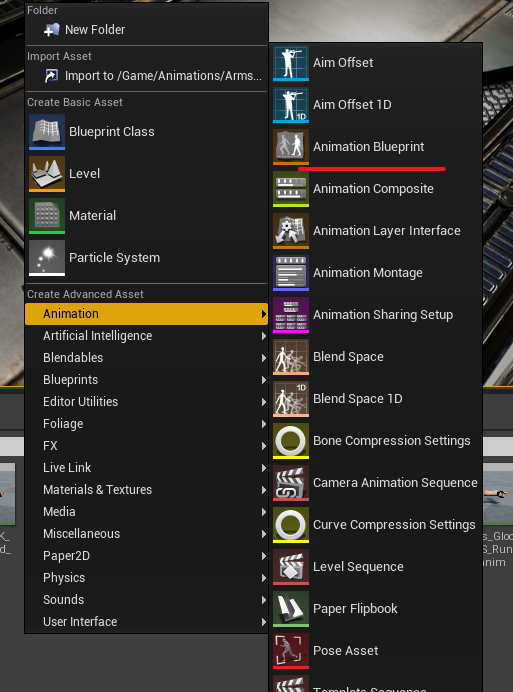
2. Let's make an animation blueprint. This blueprint contains all of the animation logic for specific objects, such as our arms. Create an Animation blueprint in the Arms Animations folder and select our Arms skeleton. Call it ABP_Arms or something similar.
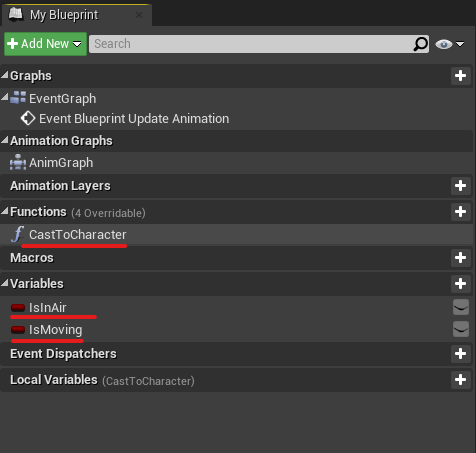
3. Open up your animation blueprint. Let us begin by defining some of the variables and functions that will be required. Make a function called CastToCharacter. This function will retrieve your FirstPersonCharacter blueprint and extract some of its parameters required for animations (Velocity and IsFlying). Create the variables IsInAir and IsMoving as well.
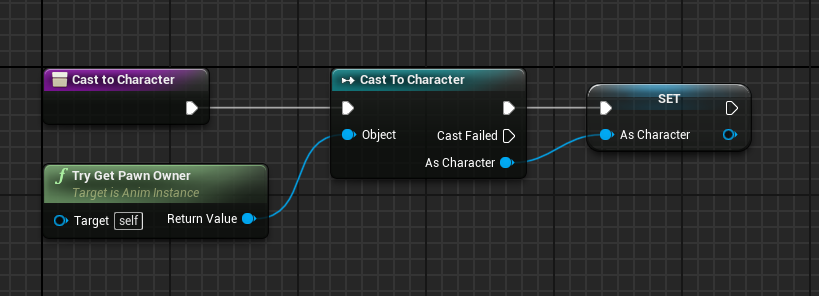
4. Let's now assign some values to our variables. We'll get those from our player and use them later in our animation logic. Open the CastToPlayer function you created and let's get the player. This function will attempt to retrieve the player pawn from where those arms are placed. They are placed in the FirstPersonCharacter blueprint in our case, so it will get this and set it to a separate variable. Try Get the Pawn Owner > Cast as a Character > Promote to Variable CastedCharacter is the name given to this new variable.
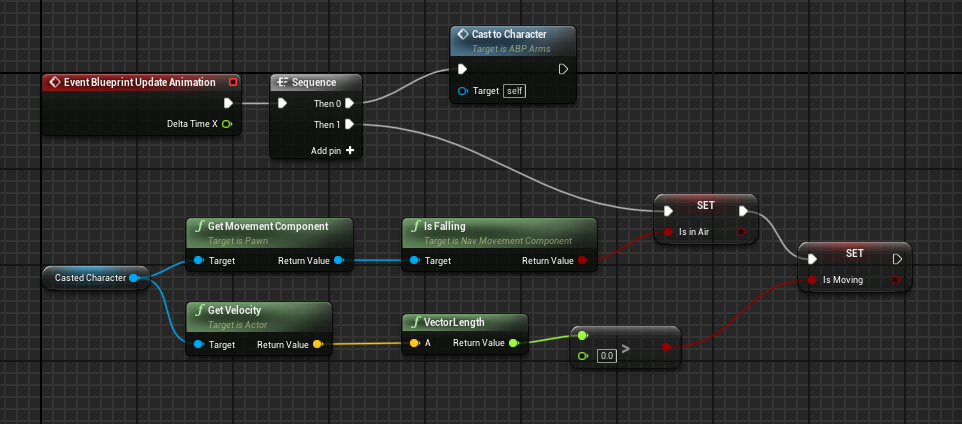
5. Let us now update our variables. Launch Event Graph. You will notice an Animation Update Event, which occurs many times in a single second. From here, we'll create a sequence and assign values based on our player. We get the Movement Component and its IsFalling Boolean (true, false) from our casted character and set it to our IsInAir variable. Also, we get our player's velocity and check whether its vector is greater than 0 (indicating that it is moving) before setting it back to our variable.
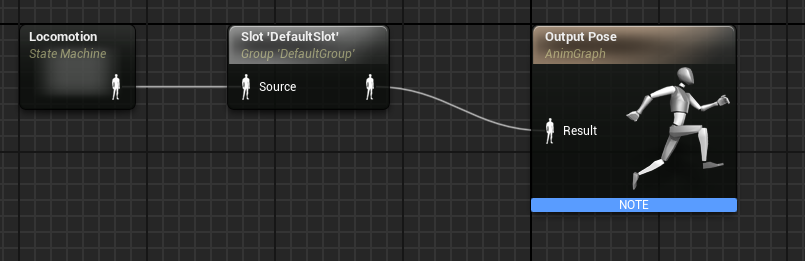
6. Let us now construct a state machine. The state machine will check the player's current state and play a specific animation based on that. Create a state machine node in the Animation graph (Add new state machine and name it Locomotion). Then we need to play in the Default animation slot (we don't need any slots for this course, but we do need to play it through the slot for it to work). Connect the result to the default slot node.
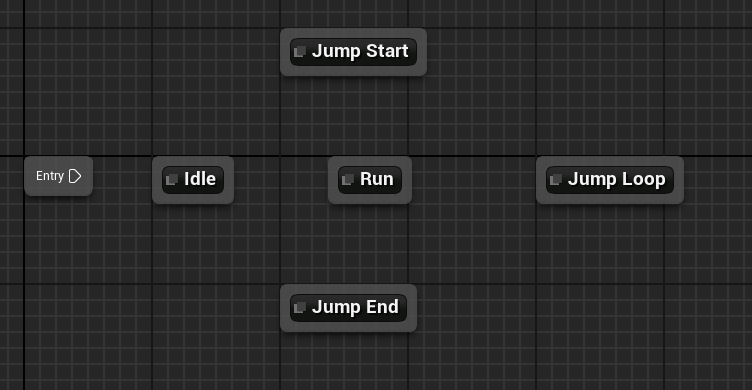
7. Launch Locomotion. Here we will create the flow of our animation. Drag and drop arms AK animations from the asset browser (idle, run, jump loop, jump start and end). You can rename them as well.
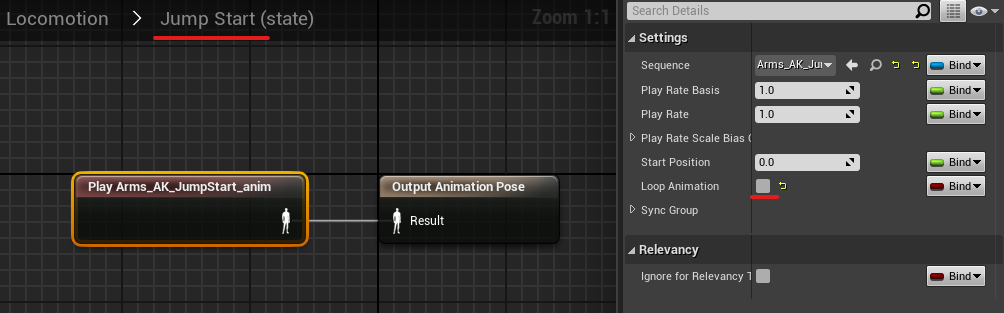
8. Click on Jump start/end and disable looping for them.
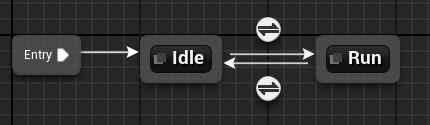
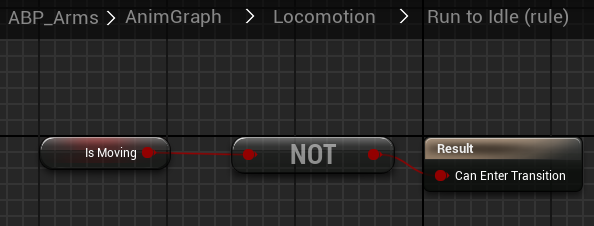
9. Let's connect those nodes and define the rules. First, connect the entry to idle, which will play as the default. Then connect idle to run and vice versa. Select the rules by clicking on the transition buttons. To play the running animation, we obviously need the player to move. Take the IsMoving variable and make it the rule. We need an opposite rule to transition from run to idle, so we simply add a NOT node.
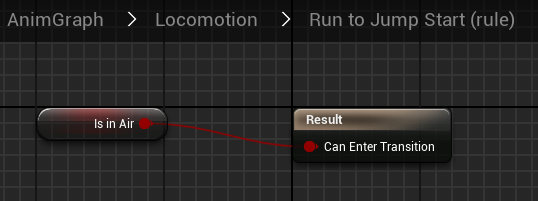
10. Lets make same thing with our jumping. But this time transition from idle/run to jump start we will be using isInAir variable.
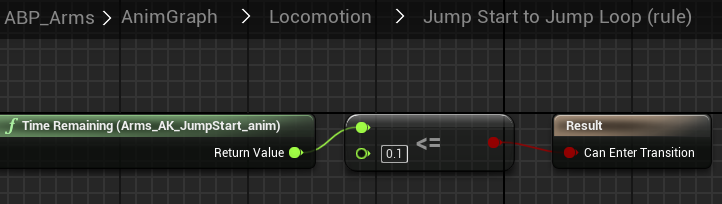
11. We need to check the remaining time of the previous animation from Jump start to Jump loop. We will use the Time remaining node. If there isn't much time left before the animation ends, we'll move on to the next (If our jump start animation is ending we are transitioning to jump loop animation).
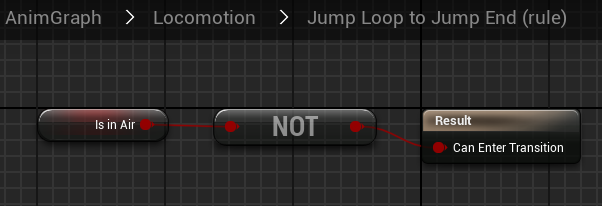
12. From jump loop to end we need to check whether we are in air.
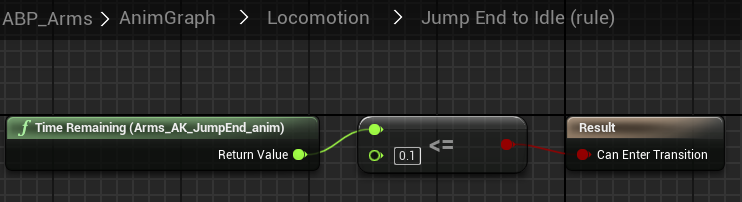
13. From Jump End to Idle we are going to check time again. If its ≤ 0.1 then we are transitioning.
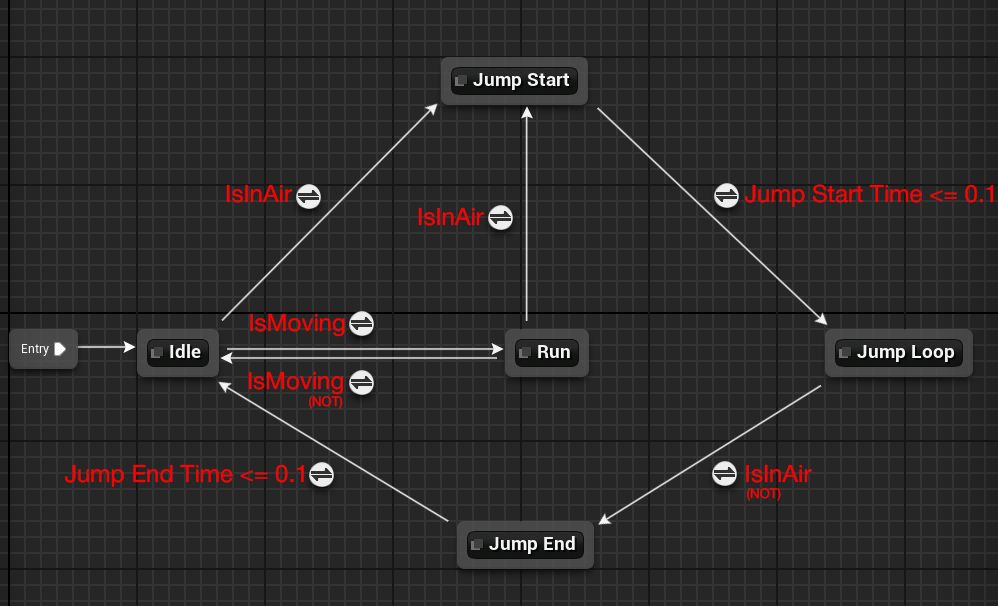
14. Compile and save. Final Locomotion should look like this
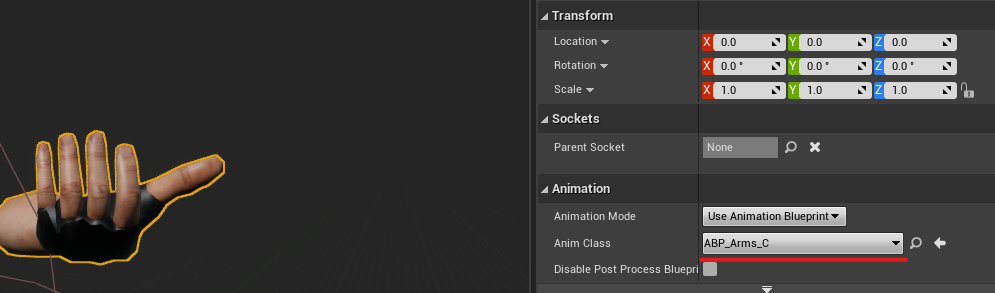
15. Let's pick an animation blueprint for our hands. Open your FirstPersonCharacter and select Mesh1P Animation blueprint. Then, position your arms in best position.
Adding weapon
Now lets add weapon into our arms
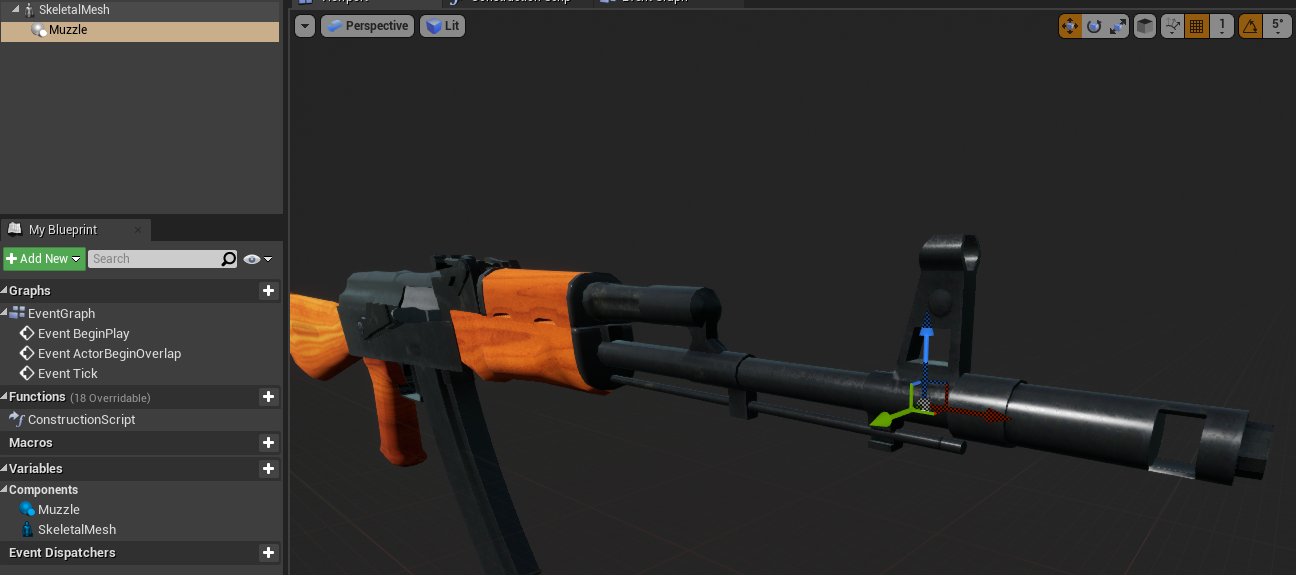
1. Make a weapon base blueprint (new actor class blueprint). Assemble a Skeletal mesh component as a root (drag skeletal mesh into default scene root component). In the mesh section, select AK.

2. Make a scene component called muzzle. Attach it to the AK muzzle. We'll spawn bullets from there later.
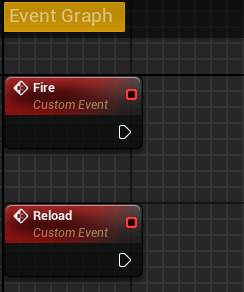
3. Open event graph and create custom events for Fire and Reload (Add custom event node).
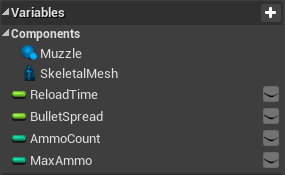
4. Create variables for our weapon. ReloadTime (float), BulletSpread (float), AmmoCount (int), and MaxAmmo are all required (int). Integer is a whole number, whereas float is a number separated by a comma.
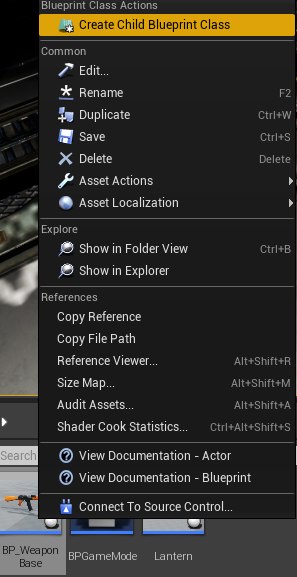
5. Create a child blueprint dependent on our base. When you have a lot of game objects with similar properties, such as weapons, a parent blueprint comes in handy. Because every weapon has MaxAmmo, etc., you don't need to rewrite it for every gun you make in game; simply inherit from the parent blueprint.
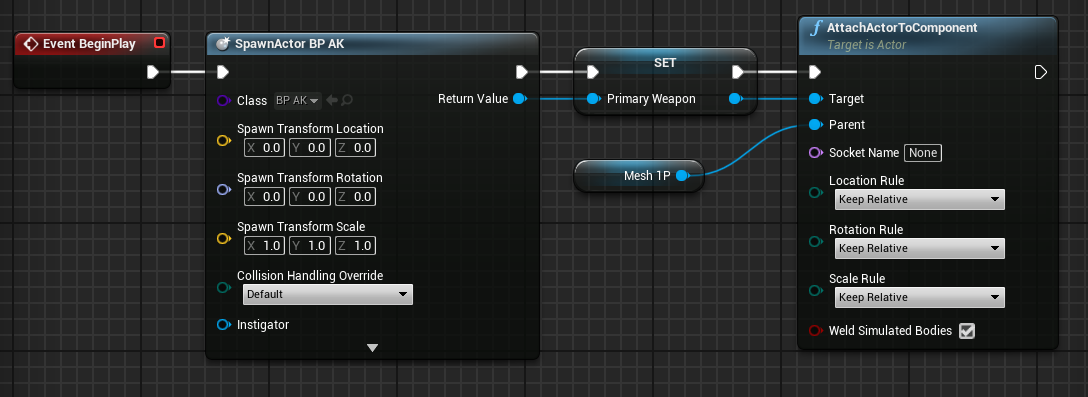
6. Let us now put our weapon into action. Create an event BeginPlay node in the FirstPersonCharacter Event Graph. Create a SpawnActor Node and select our AK Blueprint (Also right click on Spawn transform and Split struct pin). Then drag and promote the return value to variable (name it primary weapon). After that, attach an actor to a component node, set the target to primary weapon, and set the parent to Mesh1P.
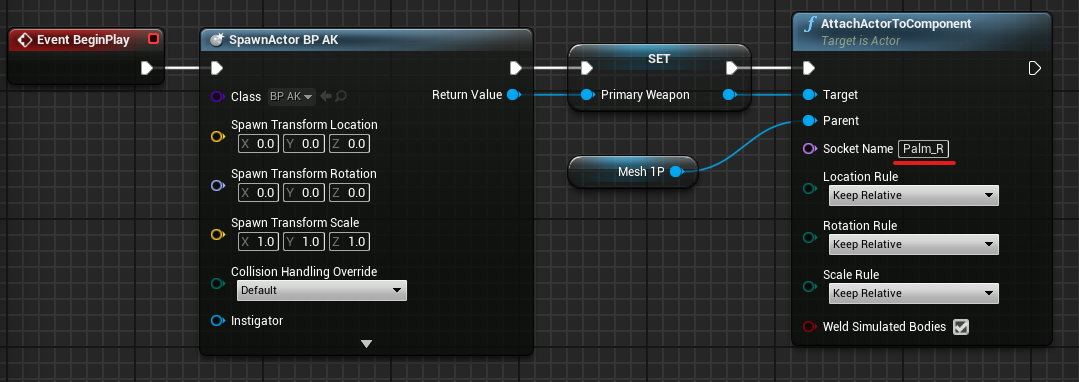
7. Now we must select the socket to which our weapon will be attached. Palm_R is the name of socket in our arms, and you must set the exact name. Compile and save your work after that.
Now you have your character with arms and weapon.
We'll make our weapon shoot and reload in the next lesson.
© 2025 Edward Leks. All rights reserved.